Welcome to the Rose Thrift Cardigan Knitalong, hosted by Plymouth Yarn Company and Meghan Jones of Little NutMeg Productions.
Join me (Meghan) as we work through every step of the gorgeous Rose Thrift Cardigan from planning to finishing and make yourself (or a friend) a spectacular knitted cardi!
Lesson 1
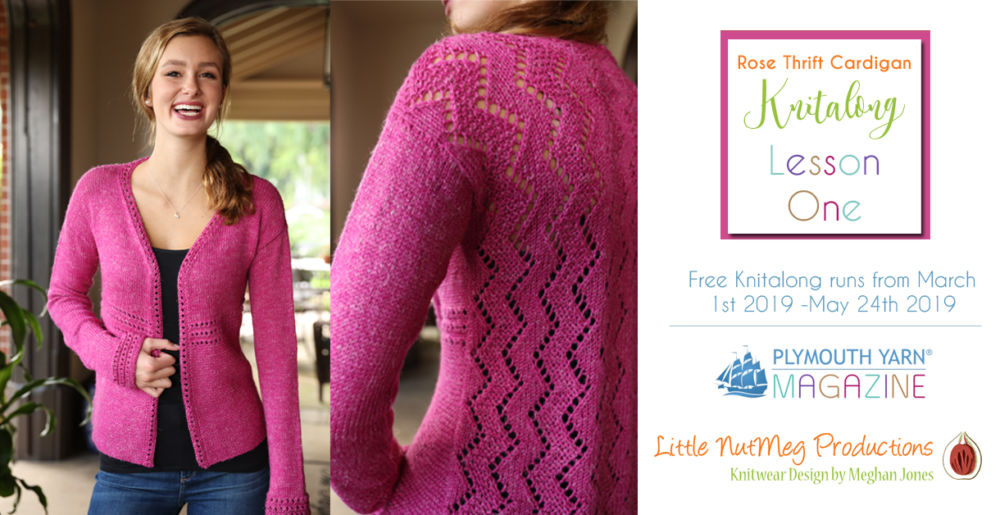
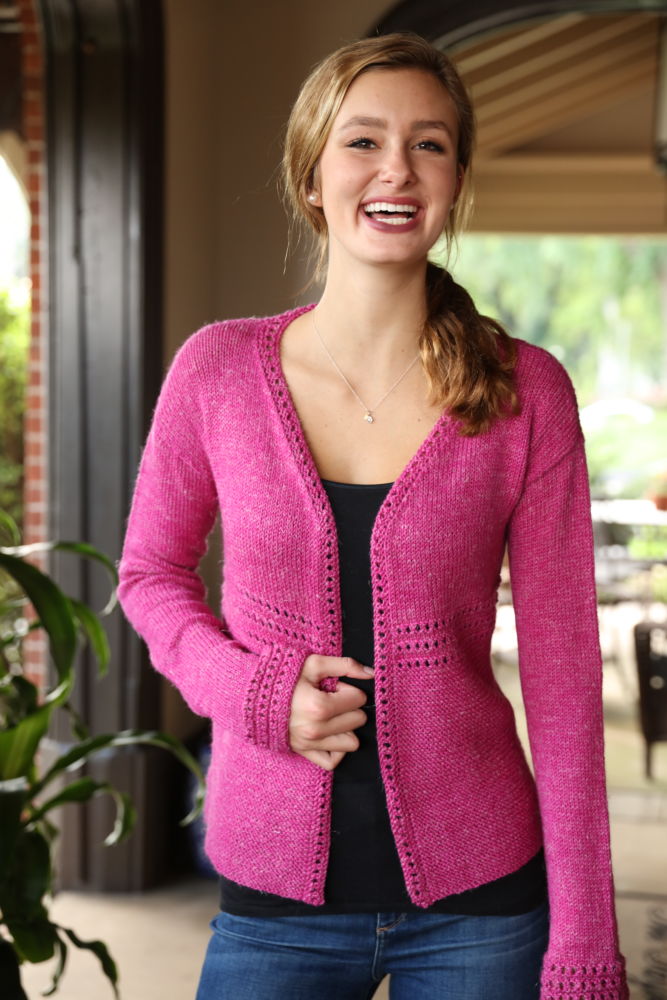
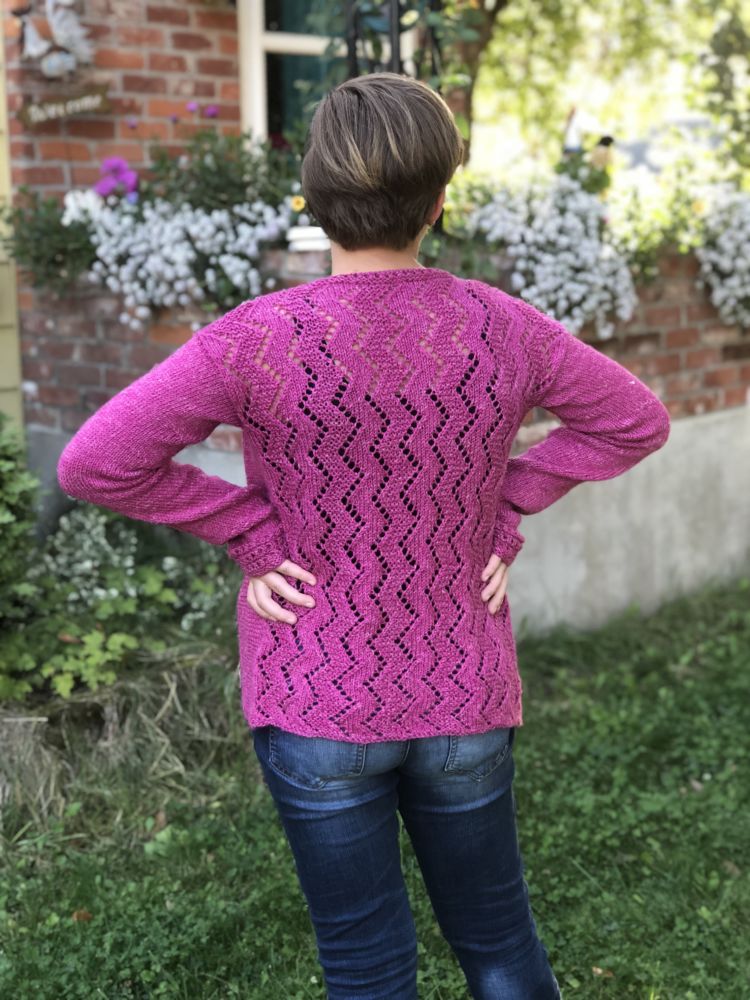
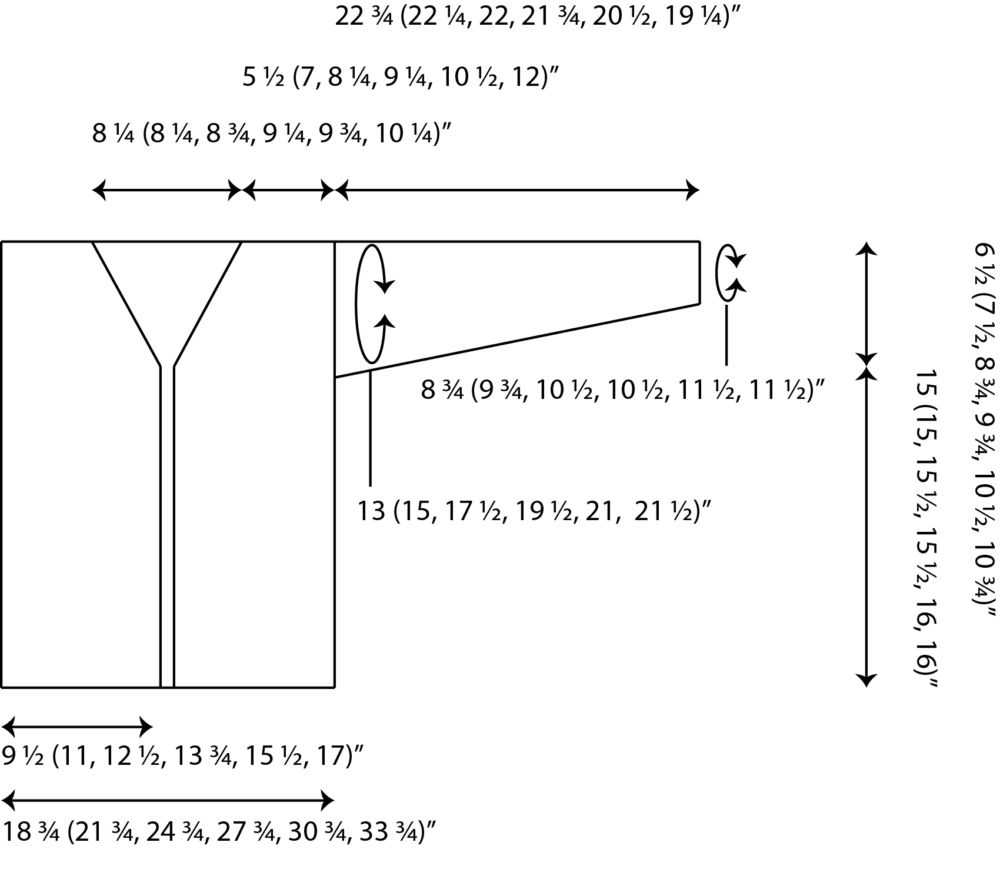
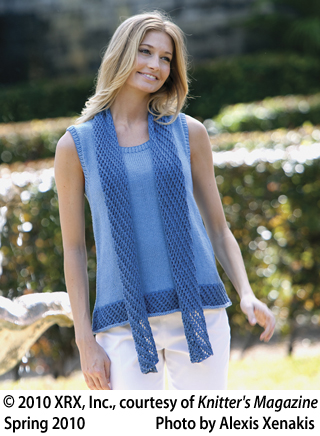
To begin, let’s take a look at the schematic, as there are a few key elements that should be looked at when choosing a size for this garment. On the model, this garment is shown with about 2 inches of positive ease.
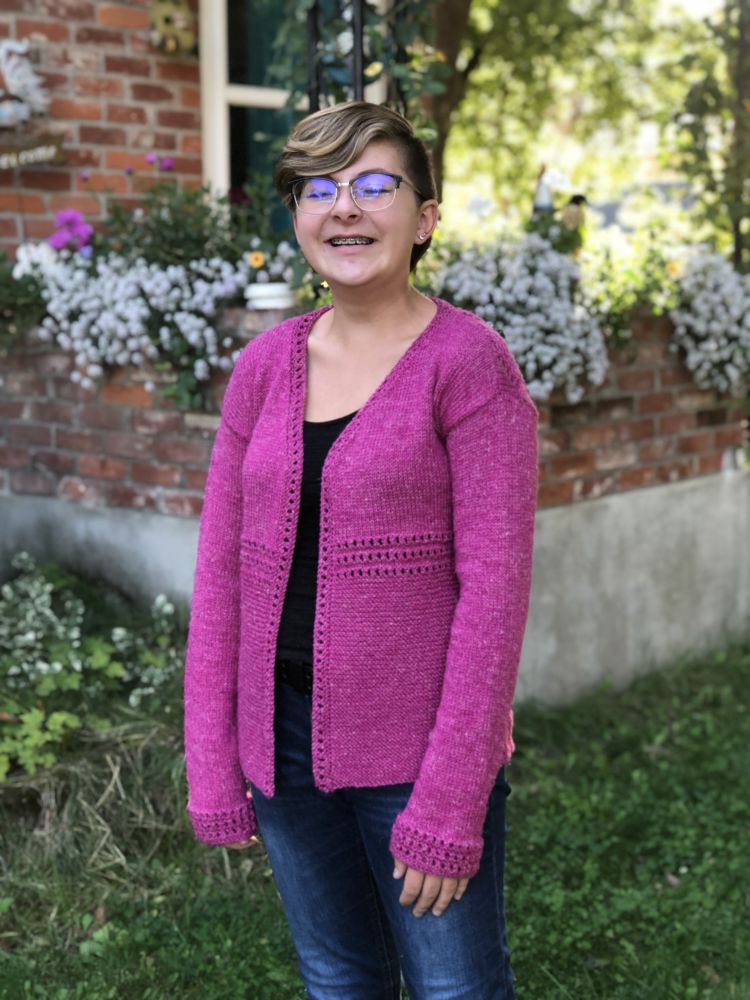
And on my daughter, you can see the cardigan with 0 inches of positive ease (although she is only 12 in this photo, Abby has a 36-inch bust and is 5’4” tall; she typically wears a Woman’s S-M size garment. EGADS! Isn’t she cute!?).
Because the back of this garment is worked with an allover lace pattern which has a stitch multiple of 12 sts (the gauge per inch over the lace pattern is 4 stitches per inch, so each additional multiple of 12 stitches is 3 inches more width), the bust circumference sizing jumps about 6 inches between sizes. For this reason, we are going to break the schematic into components and make sure that each piece will end up a size that makes a perfectly fitting sweater!
Make sure you have a recent set of measurements for the sweater’s recipient; since we are starting with the back, we will begin by measuring:
- the bust circumference
- around the back from center underarm to center underarm
- the hips total circumference
- the upper arm total circumference
At this point I would like to remind you of two things: What you have written down are numbers that are tools for creating a garment that fits, and that what really matters is the size of your heart (the rest is just padding to keep it safe).
My measurements are:
- bust circumference: 54 inches
- around back: 24 inches
- hip circumference: 56 inches
- upper arm circumference: 17 inches
Looking at the schematic below, I can see a few things:
- My bust fits best into the fourth size.
- My back size fits best into the third size.
- My hip circumference divided by 2 fits best into the fourth size.
- My upper arm fits into the third size, but only has ½” of ease, which might not be enough if I am wearing a shirt underneath, so I think the fourth size is best.
I know that since this sweater is worked from the bottom up, the easiest size for me to start with would be the fourth size. At the stated gauge, that size will fit my half hips and bountiful booty well, but when I get up to the upper back it will be a bit large and oversized. Because the back of this sweater is a straight rectangle there is no shaping, so the easiest way to change sizes is adjusting the needle size at the armhole depth. I don’t need the back to be as small as the third size, but a few inches smaller than the fourth will fit me nicely. This means that when I swatch the lace pattern I will be swatching it on 2 different needles, the recommended US size 6 (4mm) and one size smaller US size 5 (3.75mm), which is the size needed for the garter stitch section on the front.
Things to consider: When I make the upper back width narrower, this will affect the size of the shoulder which will in turn affect how I join the back shoulder to the front shoulder. I can calculate exactly how different this will be when I do the swatches and then make a choice about possibly reducing the number of decreases on the front pieces.
Other Possible Alterations:
- If your bust measurement fits nicely into a size but you need more hip room, try using a larger needle size for the lower back.
- If you have an hourglass figure and desire a more fitted cardigan, try using a smaller needle for a few inches of length at your narrowest point.
- If you want to add or subtract length from the lower body, you may do so with complete abandon! It is the most easily adjusted measurement on the garment; just make a note of any changes for when you work the front.
- If you find that you need to change the upper arm size (whether that is smaller or larger), I suggest you pick one of the stated armhole depths as this will save you a lot of math when it comes to making the sleeves. The armhole depth to work is half the stated circumference of the sleeve, so divide the circumference by half and work that length from the armhole marker to the shoulder.
- If you are considering changing the neck width, it is most easily done when working the fronts; complete the back including binding off and placing markers for the neck as written.
Why are there markers used on the side of the garment?
Because the back of this sweater is a straight rectangle with no shaping, the armholes are indicated by placing removable markers into each side of the work to indicate the bottom of the armhole. Markers are also placed into the edge of the bind off to indicate the neck opening and where to seam the shoulders.
Swatching the Lace Pattern
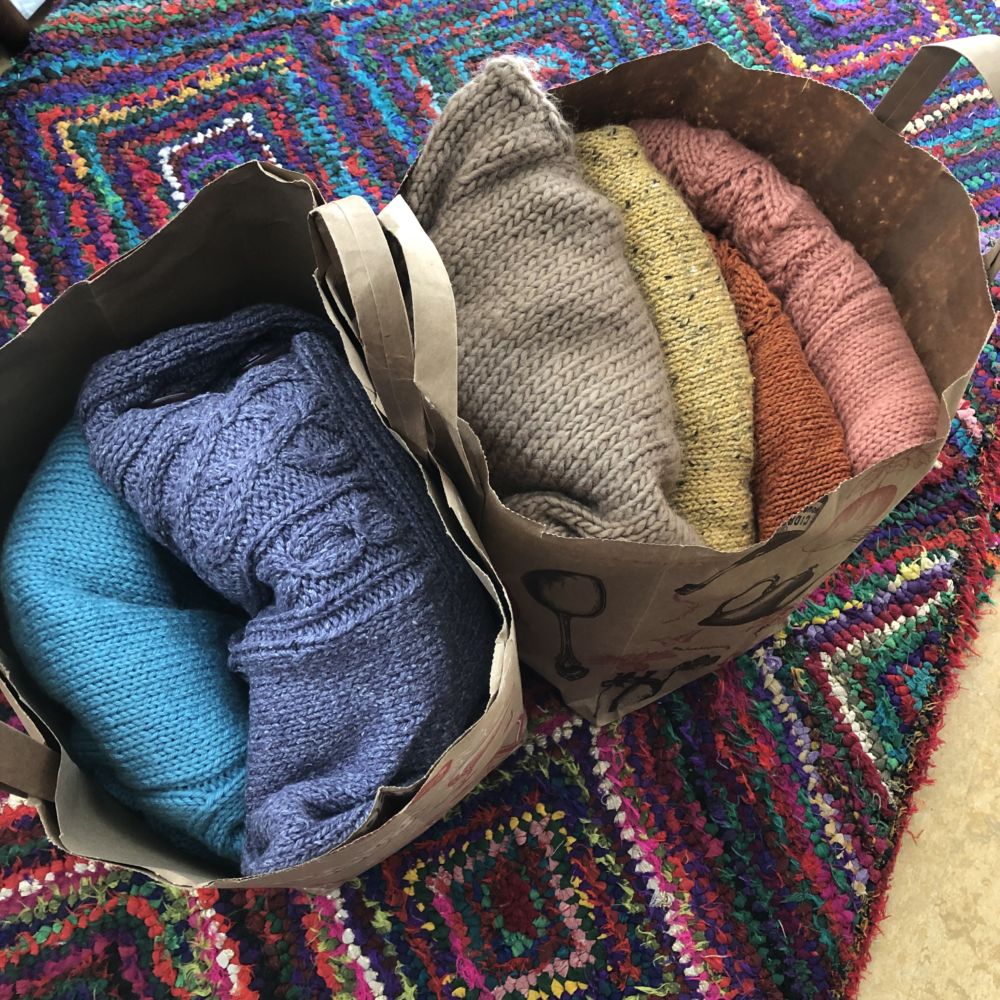
For this cardigan we are going to swatch in three different patterns on two different needle sizes. We will start with the lace pattern and then next lesson we will do the stockinette and garter. I know, swatching is boring! But swatching means that I will have precious information about how to alter the schematic to fit my body the best. I look nothing like the lovely model and I really don’t want to add this garment to my donation bags of sweaters that I didn’t swatch for… see below…
Let’s look at the Chart
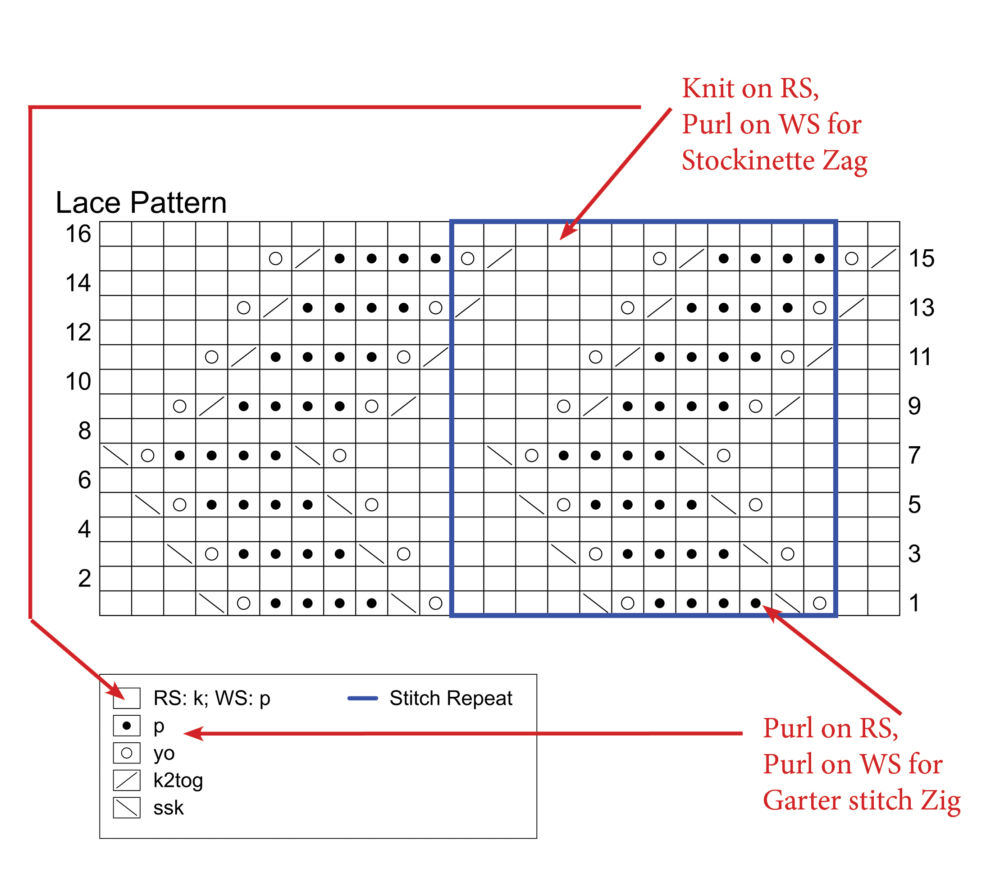
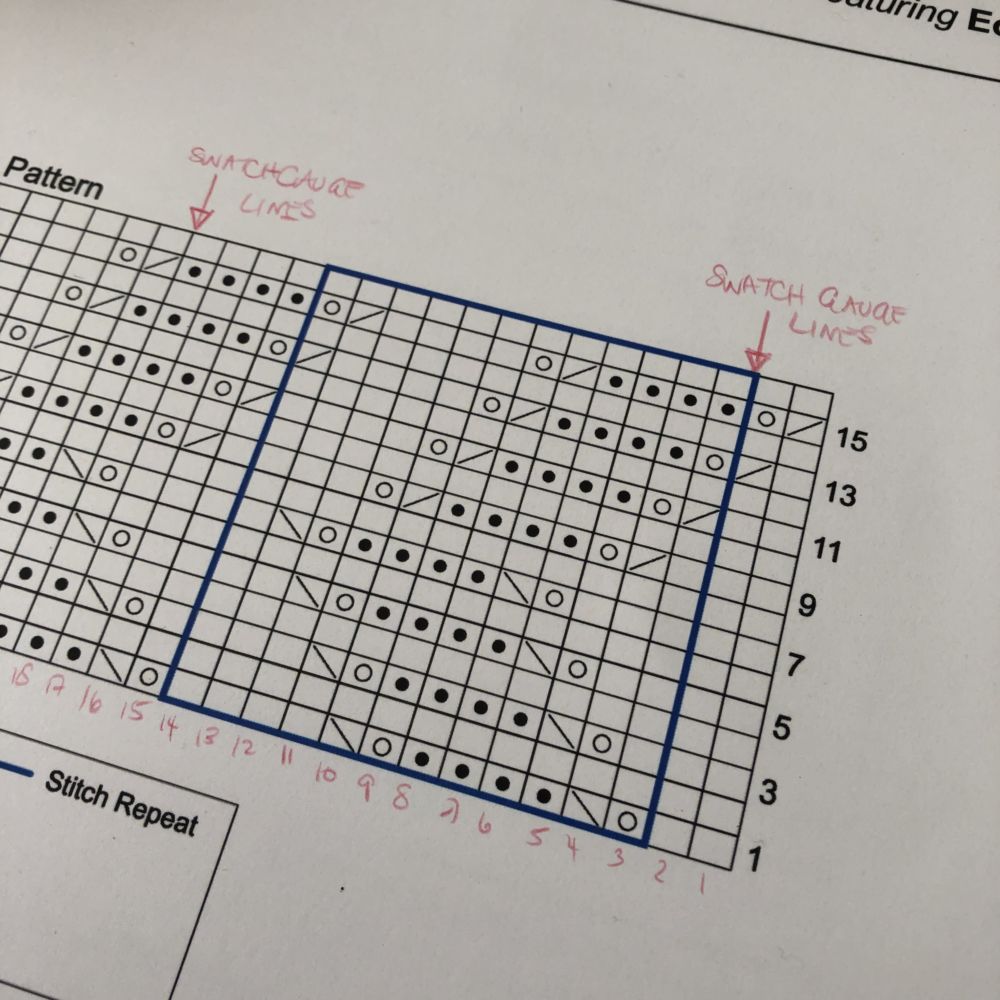
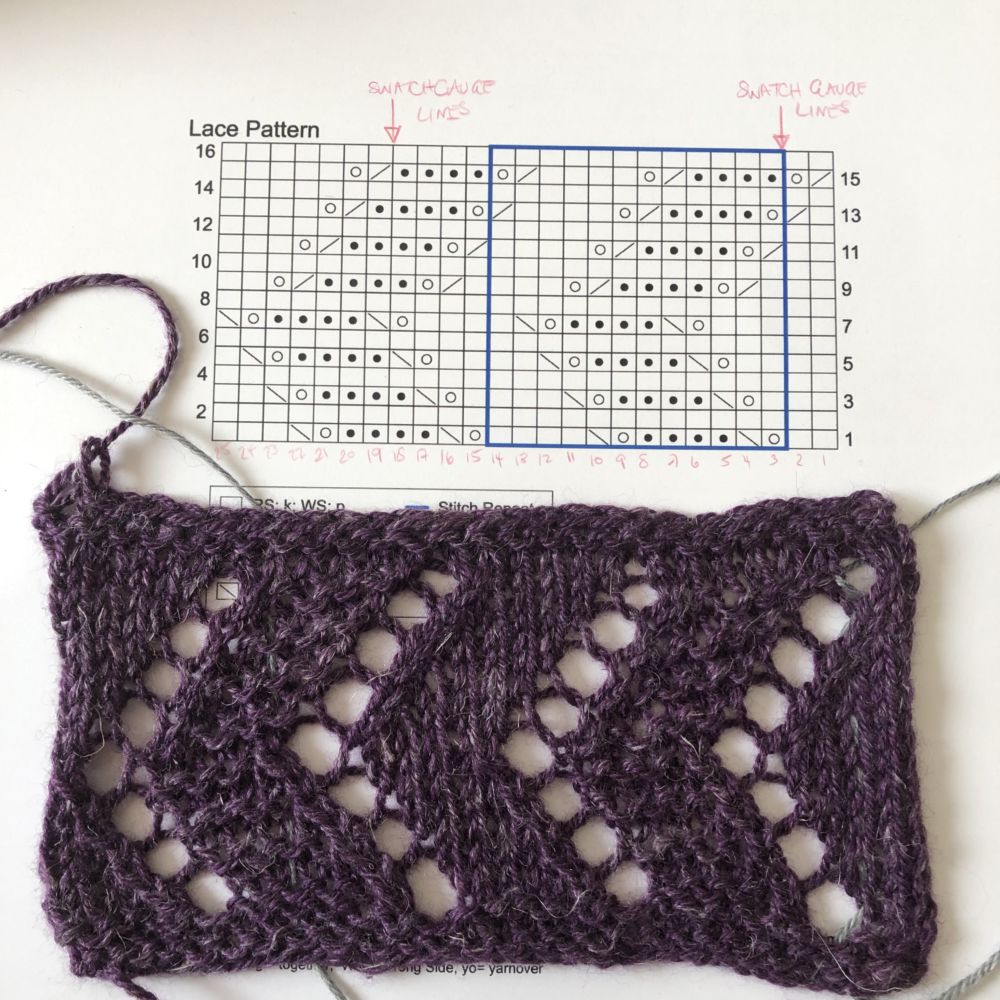
The stitches on the chart are pretty standard: yo, ssk, k2tog, knit and purl. The only tricky thing is that there are two squares that indicate a purl stitch: one is a blank square that has you purling on the wrong side and knitting on the right-side. The other is a dot that indicates to purl on the right-side. This is because the zigzags alternate between stockinette and garter stitch; instead of breaking the back into alternating stitches (it can be difficult to see the difference between the wrong side of stockinette and garter stitch quickly), I moved the purl stitches to the front of the work. This makes it easier to see which zigs are garter and which zags are stockinette; this also means that wrong side rows are all purl stitches.
If you need a refresher on how to read charts, please take a look at this tutorial: How to Read Charts
We will begin by swatching the lace pattern since we are knitting the back first and it is an allover lace pattern. Counting stitches over a lace pattern on a swatch can be tricky; all the increases and decreases move the stitches around and it can be hard to see exactly where your target gauge ends up. But there is a simple trick you can use to swatch this and any lace pattern so that the gauge repeat is visible and easy to measure.
Step 1: Make lines or arrows on the chart between Stitches 2-3 and 18-19; I just added arrows at the top since these are just for the swatch and not for the final cardigan. Cut two pieces of waste yarn a different color than your working yarn about 10 inches long; sock weight is best since it is narrow enough not to affect the gauge of the swatch.
Step 2: Cast on 27 stitches (2 stitches larger than the chart) using the same method you are planning to use for the cardigan. I like the Old Norwegian method myself since it is always stretchy but never flares out.
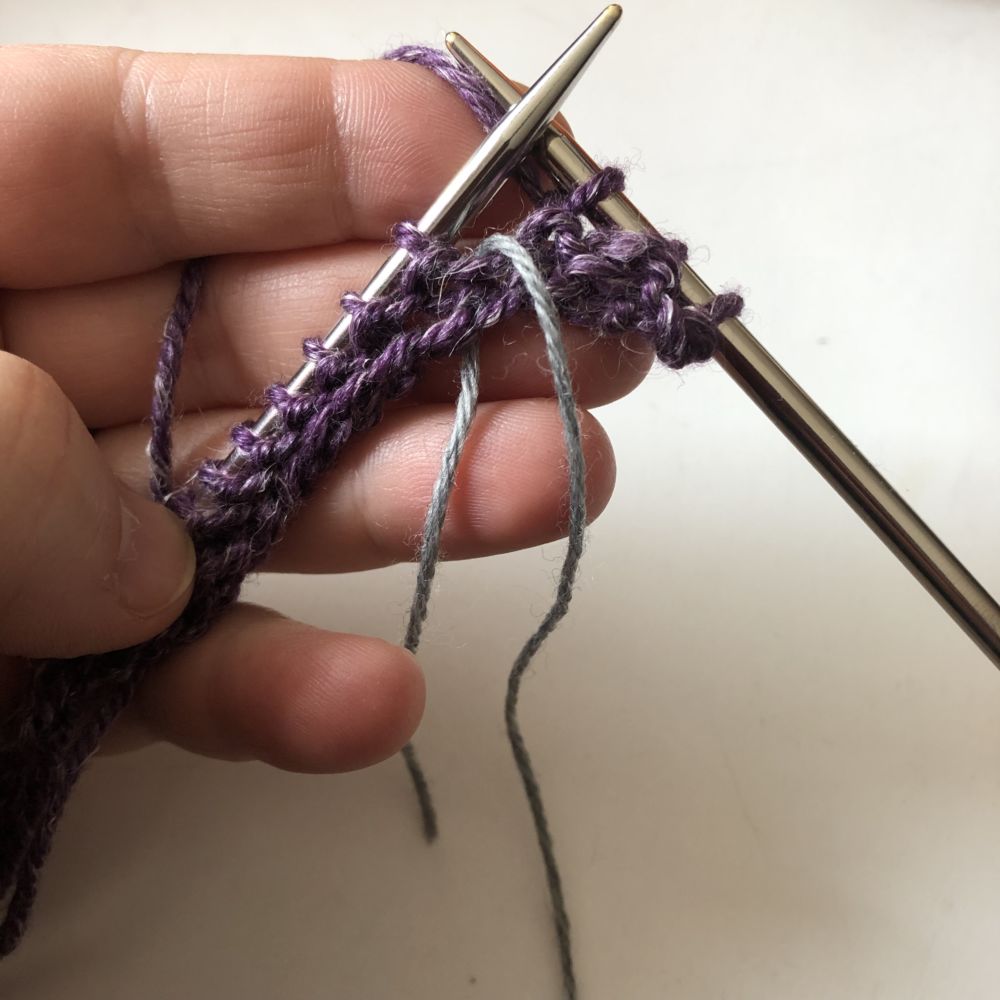
Step 3: Knit 1 row. Then on the following row, K8, place one piece of waste yarn between the needles loosely, knit 16 and place a second piece of waste yarn between the needles, knit to end.
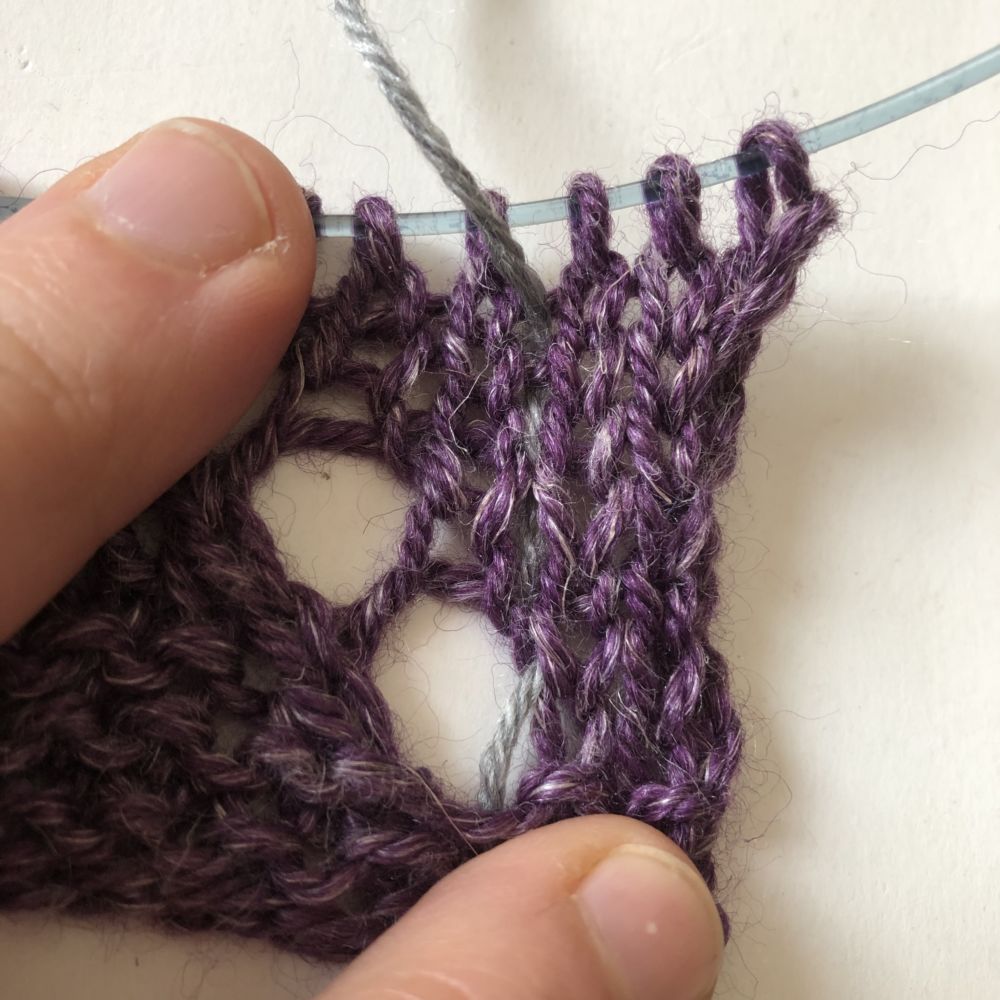
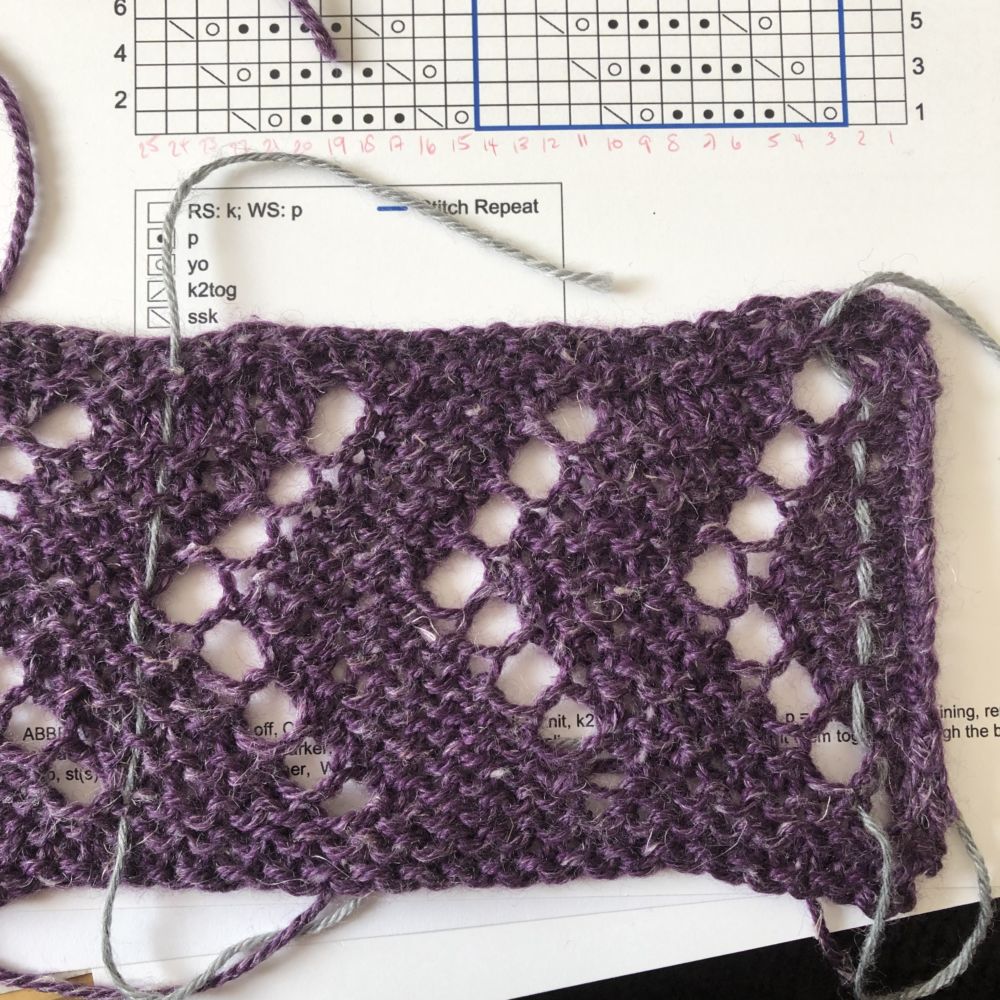
Step 4: Now work the chart over all stitches; when you come to the space between Stitches 2-3 and 18-19, bring the waste yarn to the opposite side. Whatever side it is on, just bring it between the needles to the opposite side and keep on knitting. Here you can see the waste yarn threading up the rows from the right side.
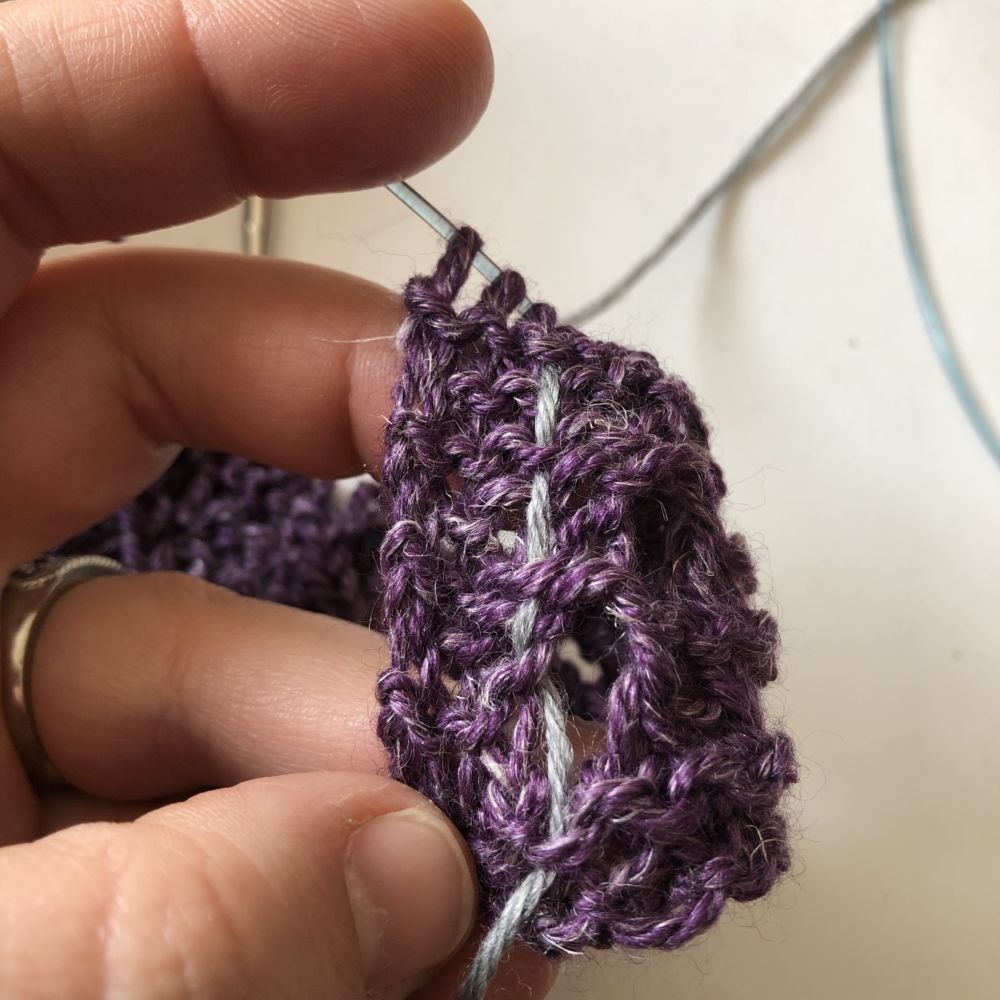
And from the wrong side.
Step 5: Finish the swatch, work 1 row of garter stitch and bind off all stitches loosely.
Step 6: Making sure to keep the waste yarn in the work , get the swatch totally wet and lay it out (I do not recommend laying it out on the printed paper pattern by the way); from the front the waste yarn is still pretty hidden.
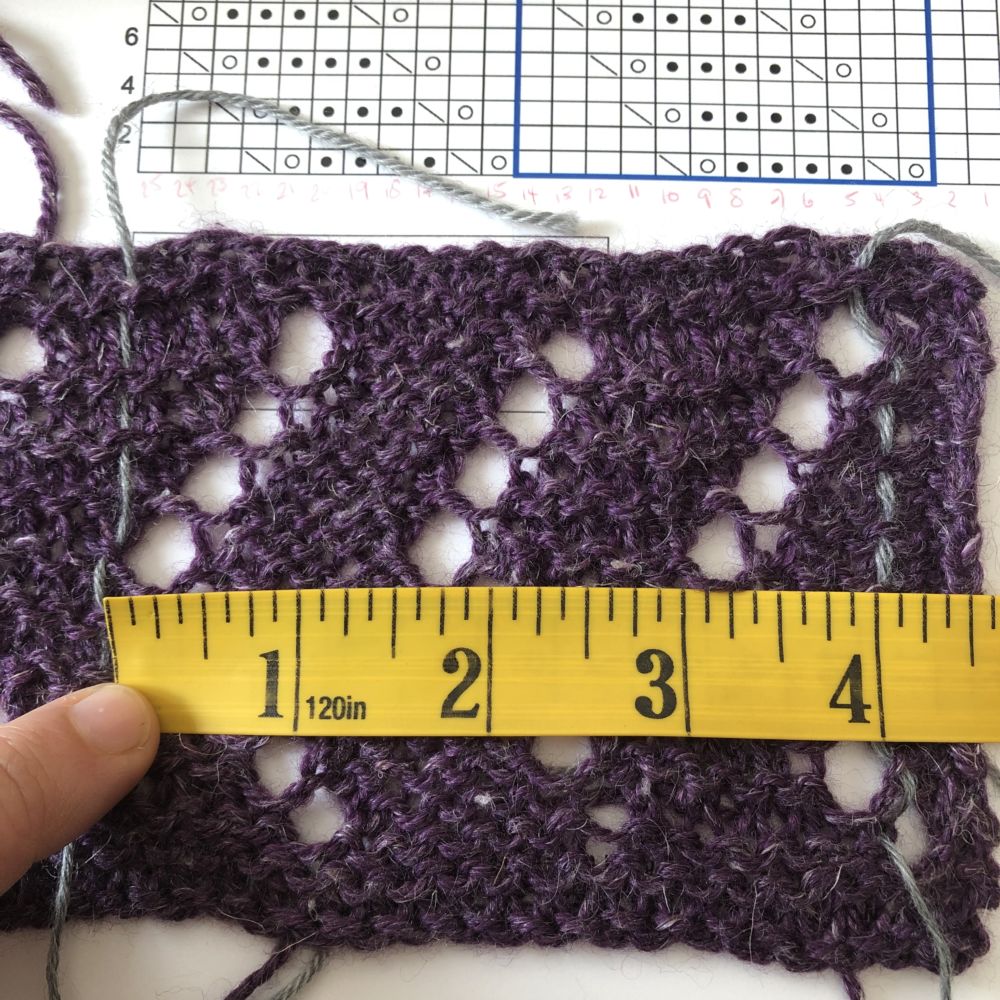
But once you flip it over those vertical lines are totally visible, and they are definitely 16 stitches apart, which is the gauge needed for the lace pattern.
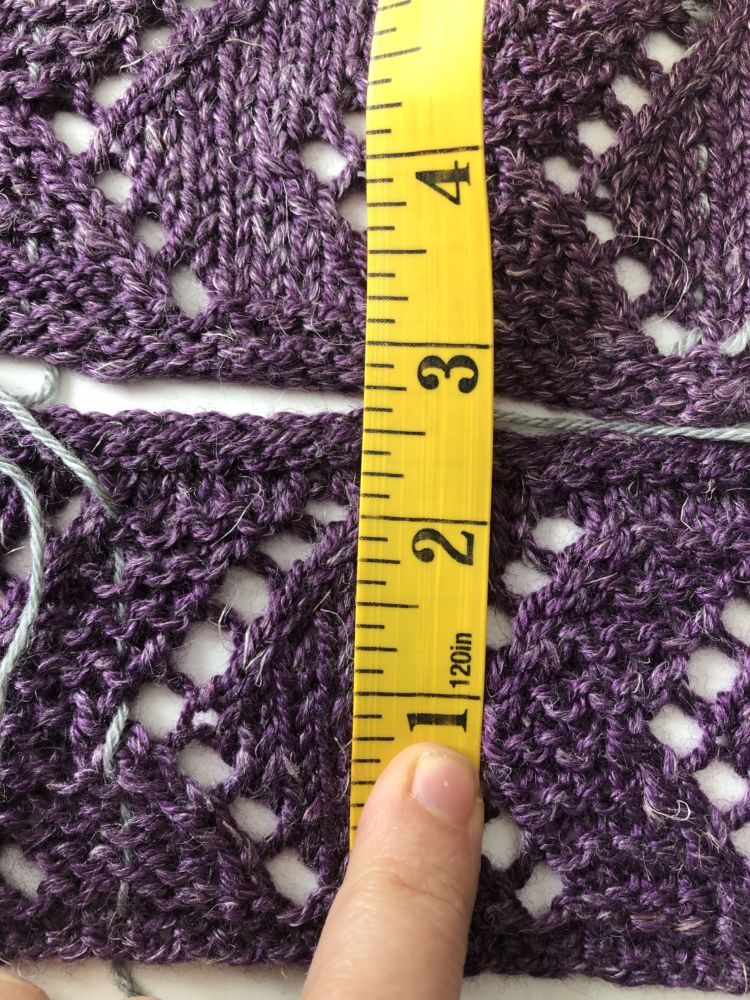
Step 7: Measure the Lace Pattern stitch gauge between the rows marked by waste yarn.
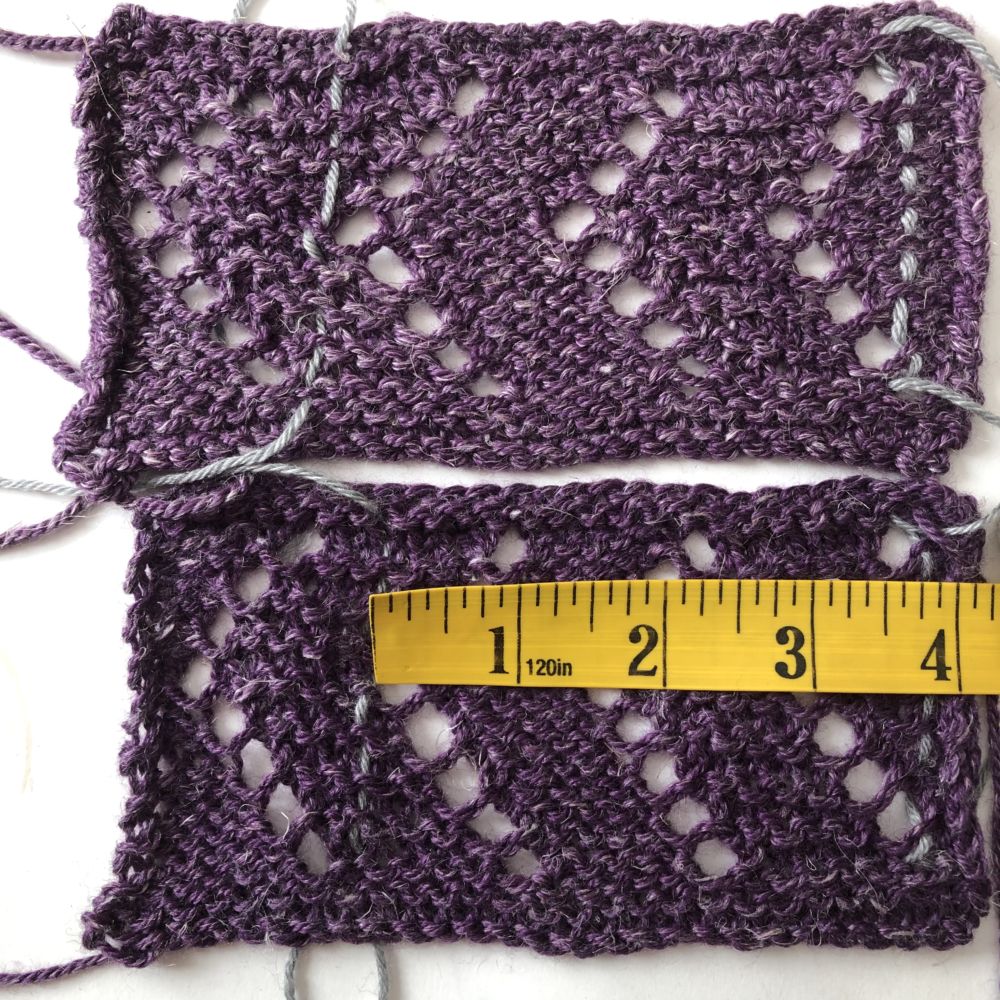
My second swatch was worked with the US size 5 (3.75mm) needles to see how much smaller the upper back will be. As you can see above, the smaller swatch worked out at 3 ¾ inches per 16 stitches, which is ¼ inch smaller than the larger swatch. This means that my upper back will be worked at 4.2 sts (16 sts divided by 3.75 inches) per inch instead of 4 stitches per inch, which will make the upper back 26 ½ inches (111 sts total cast on divided by 4.2 sts per inch) instead of 27 ¾ inches.
Trouble shooting gauge:
Hopefully you have met the gauge needed for the lace pattern on the back, but if not, here are a few tips:
- If your swatch is too big, try using one size smaller needle
- If your swatch is too small, try using a larger needle
- You can also use slippery needles to make your gauge size smaller (this will make your gauge number bigger, meaning more stitches fit into the 4 inches but the resulting swatch is smaller)
- And you can use wood or bamboo needles for the opposite effect, making your gauge size bigger with less stitches and an overall larger swatch
What About Length?
Have you ever been surprised by length? Some stitch patterns can really streeeeeeetch out after blocking and make your length a lot different than you thought it would be. This can be especially tricky over a lace pattern when simply measuring over an unblocked pattern may not help much when the swatch changes size so much after blocking.
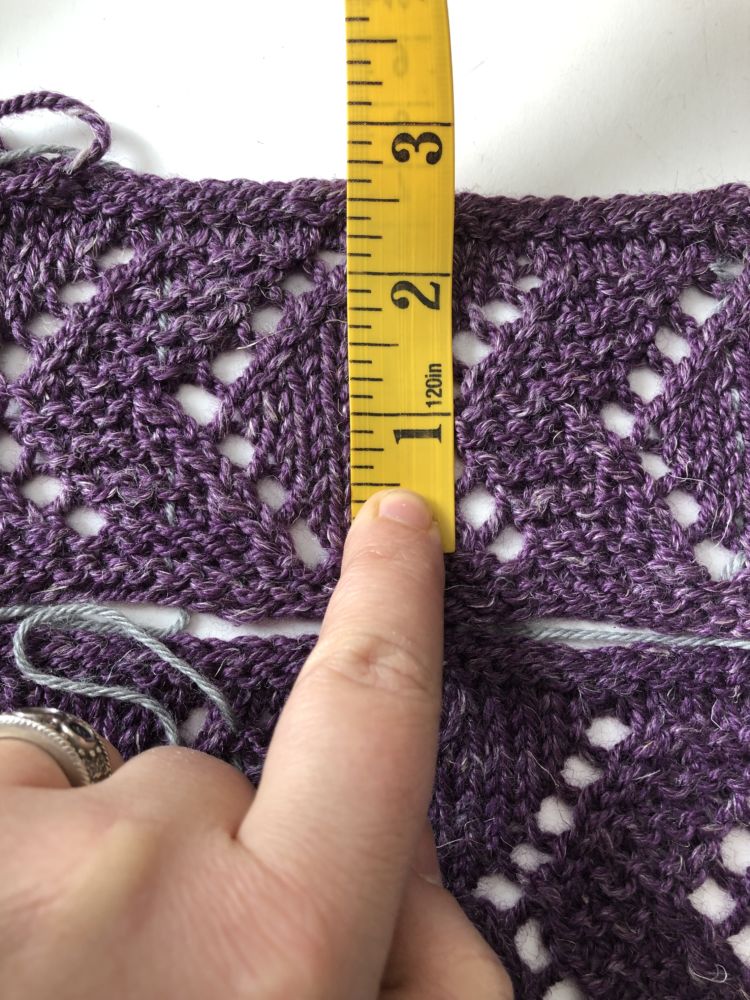
One thing to note: I took the before and after swatch length measurement on the smaller swatch; before wet blocking it was only 2 inches per 16 rows, and after wet blocking it was 2 3/8 inches over 16 rows. That can add up to almost 4 inches of difference in length over the entire garment!!
Try this:
Measure your swatch height between the garter stitch rows after blocking; this is your total length per repeat of 16 rows.
- My lower back swatch pictured above is 2 3/8 inches per 16 rows (this works out to 2.375 using decimals)
- My upper back swatch pictured below (on the smaller needles) is the same
So divide the row number by the size for the rows per inch (16 rows divided by 2.375 inches)
- My rows per inch for both swatches is 6.7
Since I want to have a total body length of 26 ¾ inches minus 9 ¾ inches for my armhole depth, I need to work 17 inches for the lower body length. But I have to minus the garter stitch border from this length; on my swatch, this border is ½ inch long, so my length to armhole depth will be 16 ½ inches total.
This means that I need to work:
- Lower back: 16 ½ inches multiplied by 6.7 rows per inch equals = 110 rows, divided by 16 rows per chart is 6 chart repeats with 14 rows remaining (if this remaining number is an odd number for you, round it up or down by one to make it even)
- Upper back: 9 ¾ inches multiplied by 6.7 rows per inch equals = 65 rows, divided by 16 rows per chart is 4 repeats plus 1 (I will add one row to this since my lower body repeat is 2 rows short of 7 total repeats; then I can have a total of 11 repeats even).
Adding those together so that I have the correct number of rows in succession I get:
Work Rows 1-16 with larger needle 6 times, then work Rows 1-14 once. Change to smaller needles, work Rows 15-16, work Rows 1-16 with smaller needle 4 times.
And one last tip:
Since this pattern is seamed, you may want to consider only joining new balls of yarn at the edges of the pieces. You might be cutting off a small amount of yarn here or there, but the benefit of being able to work the end into a seam so it is totally invisible outweighs the few long ends you might cut off.
Homework
If you would like to keep up with the steps in this knit along, then I invite you to start working on the back. The next installment of the knit along will detail knitting the fronts, how we can manipulate gauge to size them for bodacious bellies, adding short rows for bountiful busts, where to place the eyelet row for the most flattering fit, and any math changes needed for the decreases.
Sharing!!
I would LOVE to see photos of your progress on this Knit along, please share photos via Instagram using the hashtags #plymouthknitalong #rosethriftkal you can tag Plymouth Yarn using @plymouthyarn and tag me using @meghanjoneslnmp.
Questions? Comments?
Feel free to leave questions and comments in the comment section of this post, I will respond to questions as quickly as possible as well as add any Frequently Asked Questions to the bottom of this post for reference.

Meghan Jones is a full-time knitwear designer who lives with her husband and 4 children in the Inland Northwest. When she is not knitting she spends her time nurturing obsessions with gardening, cooking, and sharks. You can find more of her work at www.littlenutmegproductions.com on Instagram, Facebook, and Ravelry.


I don’t understand You said your bust was 54 and that was the 4th size. Back was a 24 and that was the third size. Hip 56 forth size and arm 17 third size. How do I know if it’s the third or forth size or first or second?
beautiful work I would like to have the pattern is that possible
Hi Lindy, in this pattern the sizes are indicated by a number separated by a comma in the schematic. If we are looking at the bottom back set of numbers we see 18 3/4 (21 3/4, 24 3/4, 27 3/4, 30 3/4, 33 3/4) inches, there are 6 sets of numbers, each separated by a comma or a parenthesis, so there are 6 sizes total. The first size is indicated by the first set of numbers, the second size is indicated by the second set of numbers… and you can see where this is going I’m sure. This is consistent throughout the schematic, so each 4th set of numbers indicates the measurement for the 4th size for that section of the garment. When working the pattern you will also find this number system and once you choose a size will need to follow the instructions for that size (if you choose size 3 for example) you will always choose the third set of numbers when given a set of numbers in this # (#, #, #, #, #) format. I hope this answers your question if not reply and I will help you out! xo Meghan
Hi Annamaria, You can purchase the pattern on Ravelry here: Rose Thrift Cardigan hope you knit along with us! xo Meghan
How exciting, got my size! I CO 87 stitches. And have noticed that I end in the middle of a lace section is that okay? What I’m doing: k1 then repeat the lace section (25 st) 3 full times then I have 10 st left of the lace section to do then k1.
Hi Laura! So you will be working the single knit stitch, then work stitches 1-2 of the chart, the blue box around stitches 3-14 is the stitch repeat box which means you will repeat stitches 3-14 to 12 stitches before the end, then work stitches 15-25 and then the single knit stitch. You need to repeat what is in the blue box instead of repeating the whole chart since otherwise you will run out of stitches before completing the pattern, make sense? Meghan
Just started the back! I’m on track!!!
Beautiful pattern. I look forward to learning how to adjust the pattern to fit my daughter. She does not like boxy sweaters. Thanks for the first set of tips.
Hi JoAnn, You may want to consider manipulating the needle sizes to create a shaped body in this sweater. For example, you can use two sizes larger needles for the cast on and reduce a needle size every third of the sweater body for an A-line shaping, or you can use a smaller needle for the center third to create waist shaping! I recommend swatching on all speculative needle sizes to know exactly what size each area will be, Lesson 2 will have detailed info on sizing the fronts -Meghan
Hi. Will the lessons be posted monthly? I just got my yarn.
Hi Natalie, The lessons will be posted every 2-3 weeks, Lesson 2 will be posted on March 22nd and it will include the date of Lesson 3 etc. -Meghan